
Requirements
- macOS 10.15 or newer.
- Xcode (latest recommended).
- Bright SDK for macOS (latest).
Important Notes
- Users must always voluntarily decide to opt in after seeing the consent screen, and must always have an easy way to opt out.
- Bright Data reviews SDK integration after initial release and regularly thereafter. Your account will be terminated if you violate the guidelines in this document.
- App Sandbox is not supported. If your app has the sandbox entitlement enabled, the SDK will not function.
- Bright Data recommends offering value in exchange for opting in (e.g., fewer ads, bonus coins, premium features). However, simply asking for user support is also acceptable.
Create App ID on Dashboard
If you haven’t done this yet, log in to your dashboard and create your app ID first.
Install SDK Files
You can set up the Bright SDK framework in your macOS app in two ways:
- Using the Bright SDK Integration CLI Tool Recommended - automatically downloads the SDK, extracts the framework, and patches your Xcode project with the necessary references, copy phases, build settings, and re-sign script.
- Manually - download the SDK from the dashboard, unzip it, and copy the files yourself.
Option A - Using the Integration CLI Tool Recommended
Option A - Using the Integration CLI Tool Recommended
Run the tool using the
bright-sdk-integration CLI. See the Apple example for full setup instructions.The tool will:- Download the latest BrightSDK zip from
cdn.bright-sdk.com/static/. - Extract
brdsdk.frameworkandnet_updater.appintoBrightSDK/. - Patch your
project.pbxproj— addingbrdsdk.frameworkandnet_updater.appwith Embed & Sign, settingFRAMEWORK_SEARCH_PATHSandLD_RUNPATH_SEARCH_PATHS. - Add a Copy Files build phase placing
net_updater.appunderContents/Library/LoginItems. - Add a Resign run-script build phase using
resign_net_updater.sh. - Set build settings:
NET_UPDATER_ENTITLEMENTSandENABLE_USER_SCRIPT_SANDBOXING = NO. - Save
brd_sdk.config.jsonfor future runs.
Option B - Manual
Option B - Manual
Download the latest Bright SDK using the Bright SDK downloader. Unzip it.SDK StructureSDK Overview
| Component | Description |
|---|---|
brdsdk.framework | SDK control API |
net_updater.app | SDK background control service |
net_updater.entitlements | Entitlements file required for re-signing net_updater |
resign_net_updater.sh | Script used in build phases to re-sign net_updater for your Apple team |
Integrate Bright SDK
Project Setup
CLI Tool users:
brdsdk.framework and net_updater.app are already added and fully configured - skip to Import the SDK.- In Xcode, select your target and navigate to the General tab.
- In the Frameworks, Libraries, and Embedded Content section, add both
brdsdk.frameworkandnet_updater.app.
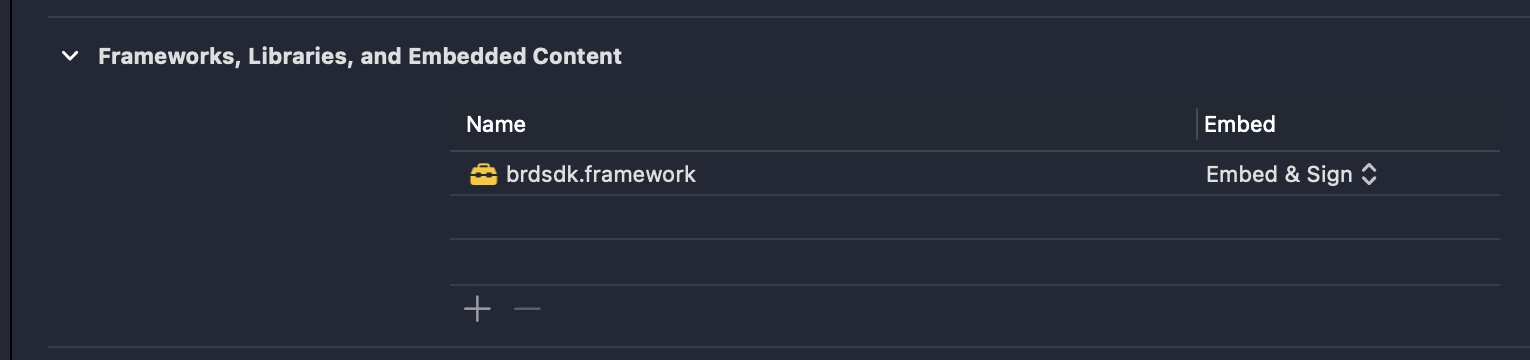
- Both items will now appear in the project structure.
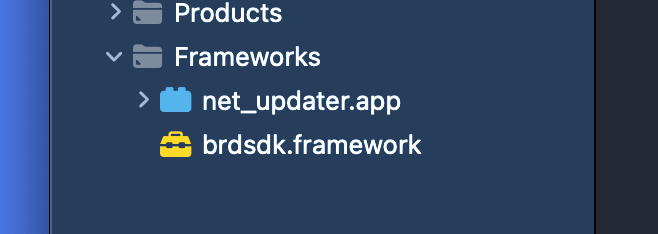
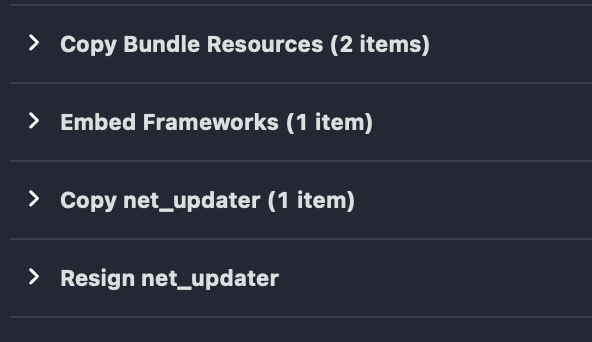
- Navigate to Build Phases.
- In the Copy Bundle Resources section, remove
net_updater.
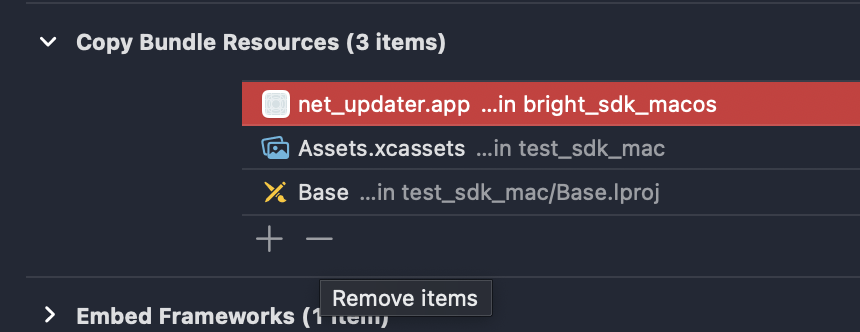
- Add a new Copy Files build phase:
- Set Destination to
Wrapper. - Set Subpath to
Contents/Library/LoginItems. - Add
net_updaterto this phase.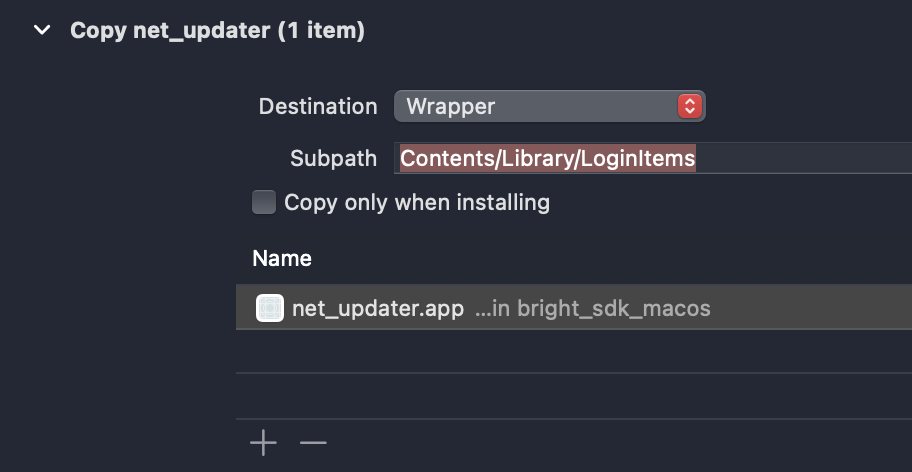
- Set Destination to
- Copy
net_updater.entitlementsandresign_net_updater.shinto your project folder. - These files do not need to be added to any Xcode target.
net_updater.entitlementsmust be placed under the${PROJECT_DIR}path.
- Key:
NET_UPDATER_ENTITLEMENTS - Value: Path to
net_updater.entitlementsrelative to${PROJECT_DIR} - Set
ENABLE_USER_SCRIPT_SANDBOXINGtoNO
- Add a Run Script build phase after the
net_updatercopy phase (e.g., name it"Resign net_updater"). - Assign
resign_net_updater.shas its content (or paste the script contents directly).
App Performance
We prioritize user experience. Ensure your app maintains good performance.Performance Guidelines:
- ✅ No input lag - ensure responsive UI interactions.
- ✅ Average CPU load: ≤ 50%.
- ✅ RAM usage: ≤ 90%.
Important: If system load is too high, we cannot use the device’s free resources. Such devices will not be counted as active and will not generate revenue.
Verify Your Integration
Before submitting, verify that the SDK is running correctly on your device:
- Compile and run your app, then click “I Agree” in the SDK consent dialog.
- Open a terminal and run:
You should see 1 process running from inside your app directory:
net_updater. - Navigate to:
- Look for the
cidfile matching your Bundle ID. It should look similar to:
If the SDK isn’t initializing / peer not connecting:
- Verify the correct App ID is used, confirm the SDK service is running.
- Check there aren’t multiple SDK apps running from the same IP — that can interfere.
- If nothing helps, check with our team.