
Requirements
- Windows operating system.
- .NET Framework 4.5 or newer.
- Visual Studio (recommended).
- Assigned App ID from Bright SDK Dashboard.
Create App ID on Dashboard
If you haven’t done this yet, log in to your Bright SDK Dashboard and create your app ID first.Format: Your assigned App ID uniquely identifies your application and associates the peers provided by your application with you in the Bright Data network.
Install SDK Files
You can set up the Bright SDK in your .NET Windows app in two ways:
- Using the Bright SDK integration CLI tool Recommended - automatically downloads the SDK, copies the required files, and patches your
.csprojwith the necessary references. - Manually - download the SDK from the sdk downloader and copy the files yourself.
Option A - Using the Integration Tool (Recommended)
Option A - Using the Integration Tool (Recommended)
Run the tool using the bright-sdk-integration CLI. See the Windows example for full setup instructions.The tool will:
- Download the latest BrightSDK zip from
cdn.bright-sdk.com/static/. - Extract
lum_sdk.dllandnet_updater64.exeintoBrightSDK/. - Copy
brd_config.jsoninto your app directory. - Inject a
<Reference>tolum_sdk.dlland a<None>entry forbrd_config.jsoninto your.csproj. - Save
brd_sdk.config.jsonfor future runs.
Option B - Manual
Option B - Manual
Download the latest Bright SDK using the Bright SDK downloader, unzip it.SDK Structure
| File | Description |
|---|---|
net_updater32.exe | Bright Data Windows service installer, uninstaller and entry point |
lum_sdk.dll | .NET API, targeting .NET Framework 4.5 (AnyCPU) |
brd_config.json | consent configuration and customization |
lum_sdk.xml | .NET API documentation for Visual Studio |
Integrate Bright SDK in Your Code
Add SDK Files to Your SolutionBuild-time DependenciesRun-time DependenciesAdd SDK Initialization to Your CodeSee Code Example and use
- Copy the following files to any location inside your repository:
lum_sdk.dlllum_sdk.xml
- Add them to your source control.
- Add reference from your main project to
lum_sdk.dll(Copy Local = true).
lum_sdk.xml is for Visual Studio to display documentation of the API and must be located next to the referenced lum_sdk.dll. It is not needed at runtime.If you used the CLI tool in Option A, skip copying
lum_sdk.dll and adding the reference - it is already copied into BrightSDK/ and referenced in your .csproj.- Copy the following files to the root of your main project:
net_updater32.exebrd_config.json
- Add them to your source control.
- Add them to your project as Content.
- Set them to be copied to the output folder.
If you used the CLI tool in Option A, skip copying
net_updater32.exe and brd_config.json - they are already in place. You still need to add net_updater32.exe to your project as Content and set it to be copied to the output folder.- Instantiate
BrightData.Api. - Initialize it during your application’s startup initialization.
- Set required fields now and you can customize the consent screen later.
- Use
brd_config.jsonand/or set them programmatically (see API Documentation). - Write handler code for the user choice changed event.
- For example: enable/disable ads or premium features.
- Close the SDK when your application is exiting.
Note: Init will show consent screen to the user only if they haven’t seen it before (didn’t agree or disagree). You can disable consent on Init completely with
Setting.SkipConsent=true and manually show it later with Api.ShowConsent().cs_winform_anycpu and cs_wpf_anycpu from samples directory for reference.Add Opt-In/Out Settings Option
Critical Requirement: The user must always be able to opt-out of Bright SDK after giving their initial consent.
Every time the user toggles Web Indexing ON, the consent screen must reappear — regardless of any previous opt-in.
- Add a switch (checkbox/toggle button) labeled “Web Indexing”:
- Must clearly reflect current status (opted-in or opted-out).
- Should be checked if
BrightData.Api.ConsentChoiceis true. - Unchecking it should call
BrightData.Api.OptOut(). - Checking it should call
BrightData.Api.ShowConsent().
- Add value text below the switch:
- Emphasize the benefits users get when opting in. (see examples)
- Include a “Learn More” option:
- Hyperlink should open a browser window: https://bright-sdk.com/users#learn-more-about-bright-sdk-web-indexing
- UX Guidelines:
- You’re free to choose the UX (radio button, switch, etc.).
- The opt-out option must be clearly labeled.
- Users must be able to freely opt-out.
Ensure the opt-out functionality is fully implemented before submitting for review. Bright Data will verify both UX and functionality during the approval process.
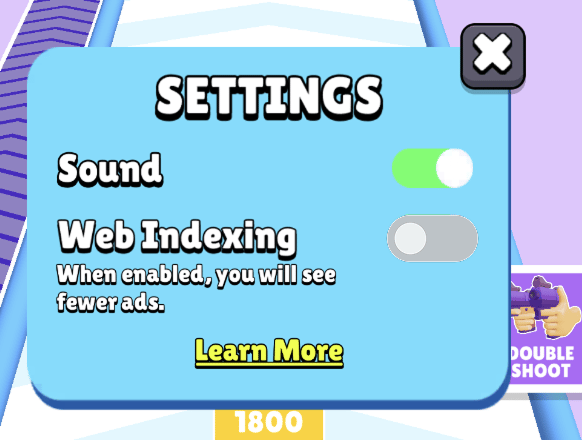
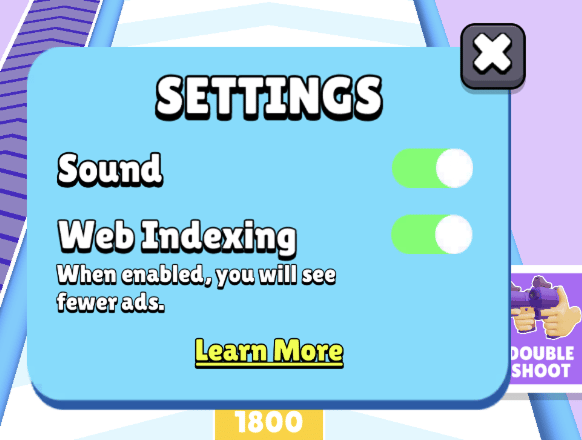
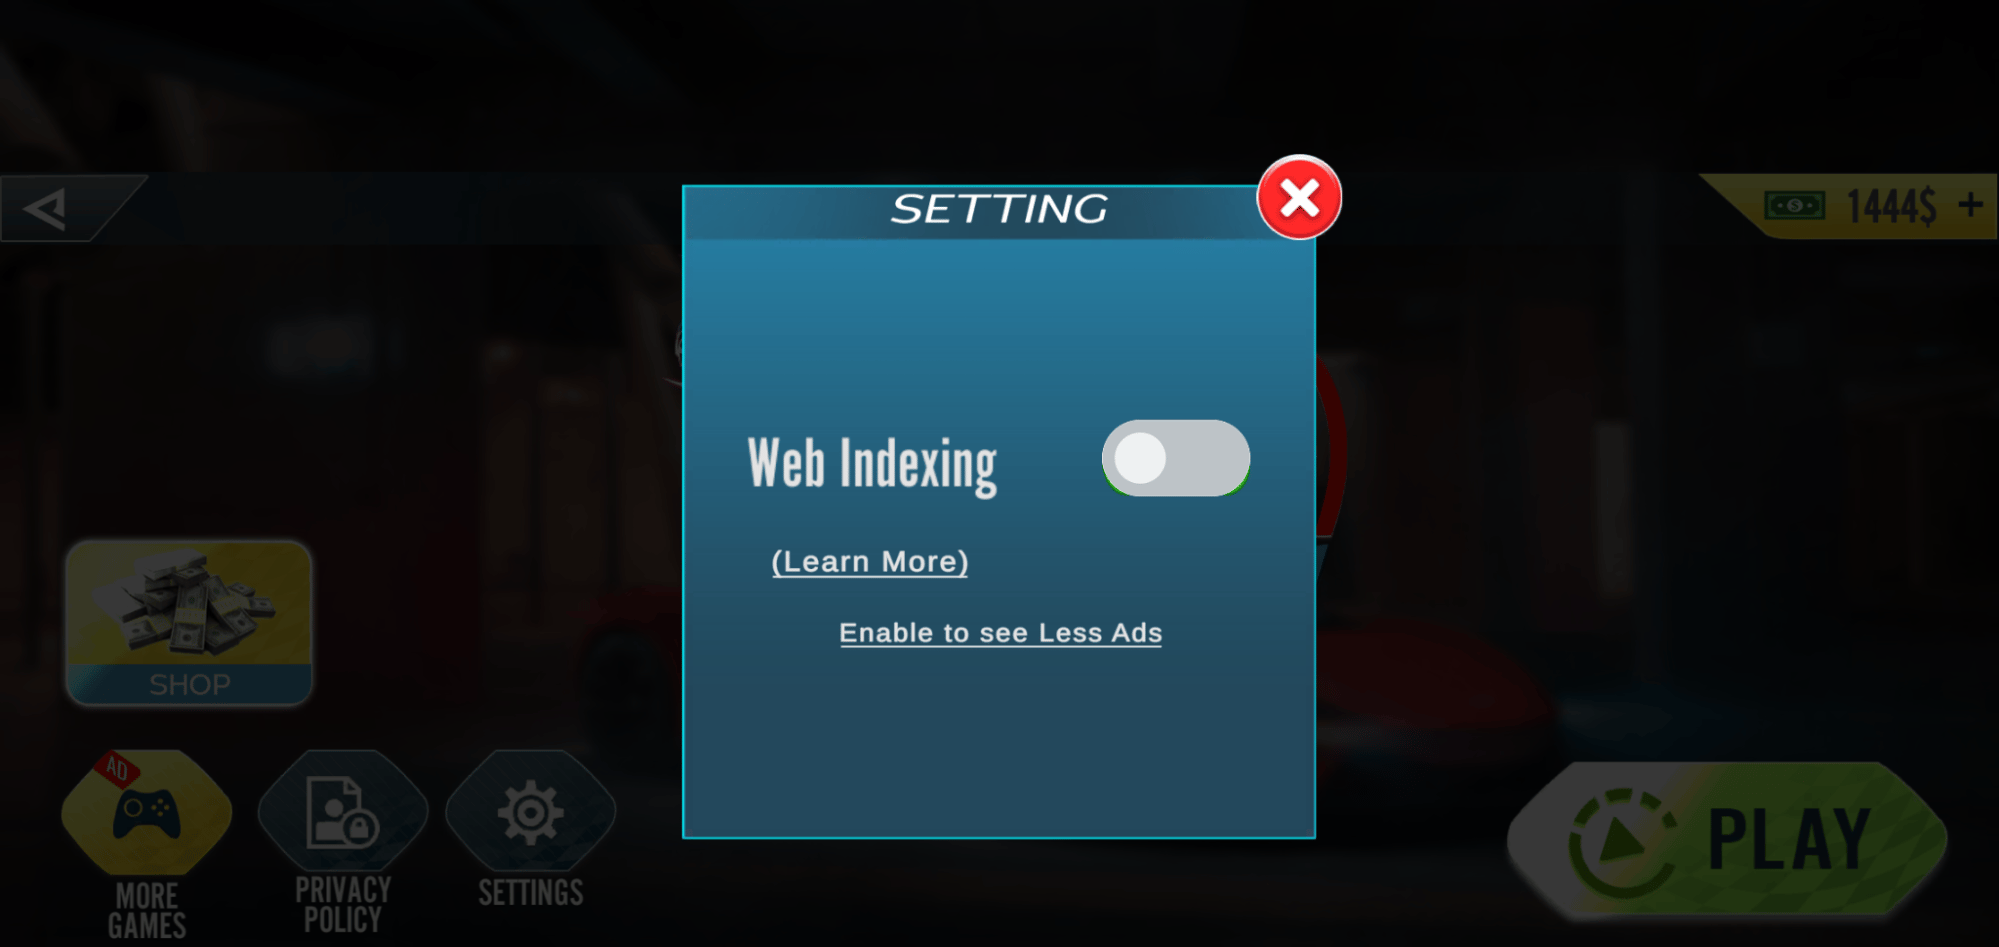
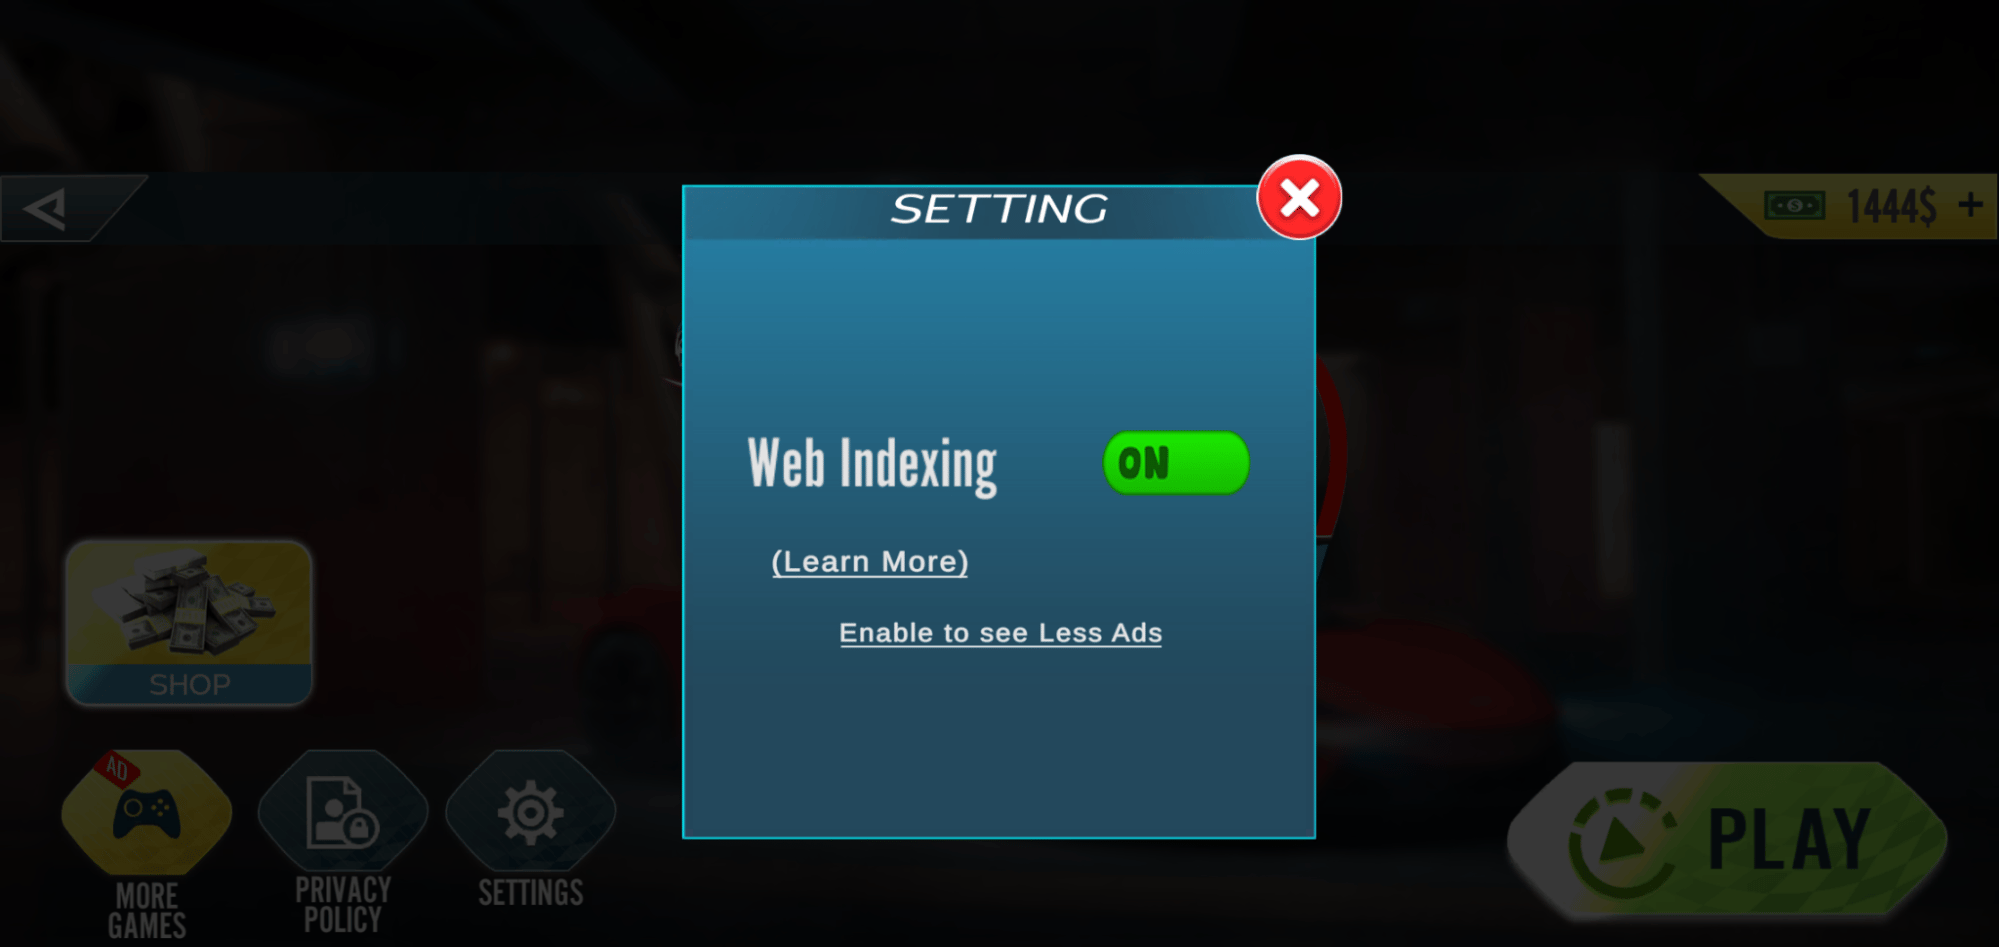
| When opted-out: | When opted-in: |
|---|---|
| Enable to see fewer ads | When enabled you see fewer ads |
| Enable to get 100 extra coins | When enabled you get 100 extra coins |
| Enable to enjoy premium features | When enabled you enjoy premium features |
| Enable to get 2 free cars | When enabled you get 2 free cars |
| Enable to unlock more levels | When enabled you unlock more levels |
| Example | Issue |
|---|---|
| Label: “Bright SDK” | ❌ Label should be “Web Indexing”, not “Bright/Bright SDK” |
| Switch without value text | ❌ Missing text emphasizing value to users |
| Switch without status indicator | ❌ Switch should clearly show current opt-in/opt-out status |
| No “Learn More” option | ❌ Missing link/QR code to information page |
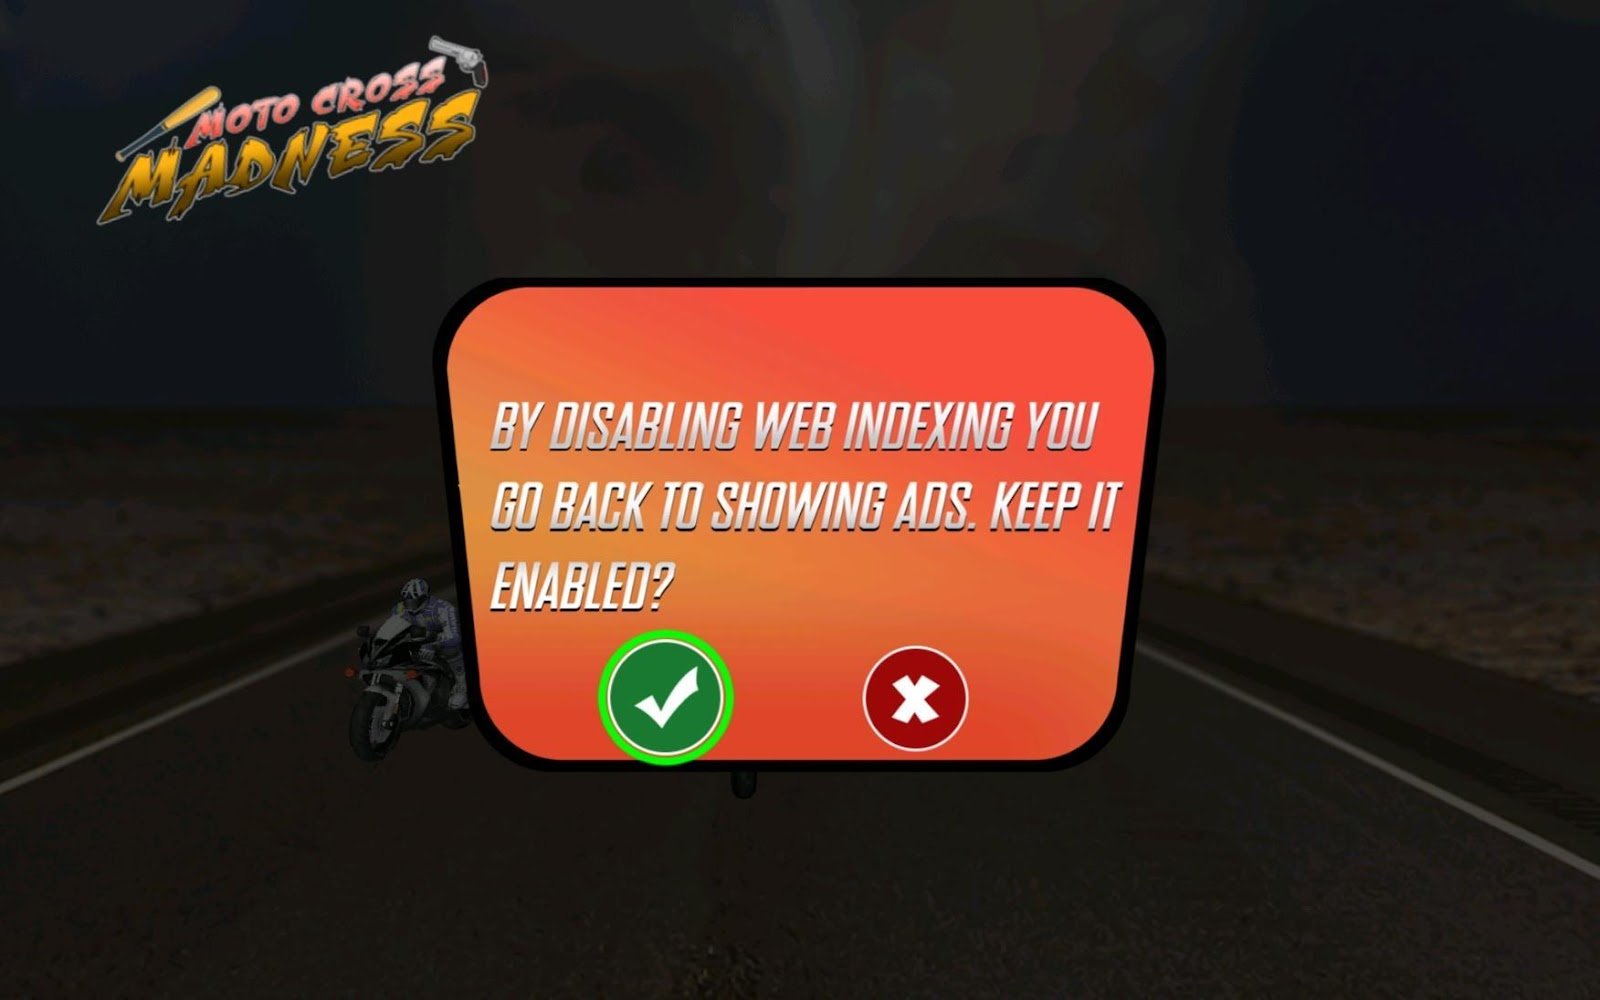
- Discourage opt-out: “If you disable Web Indexing, you will start seeing ads. Do you want to see ads?”
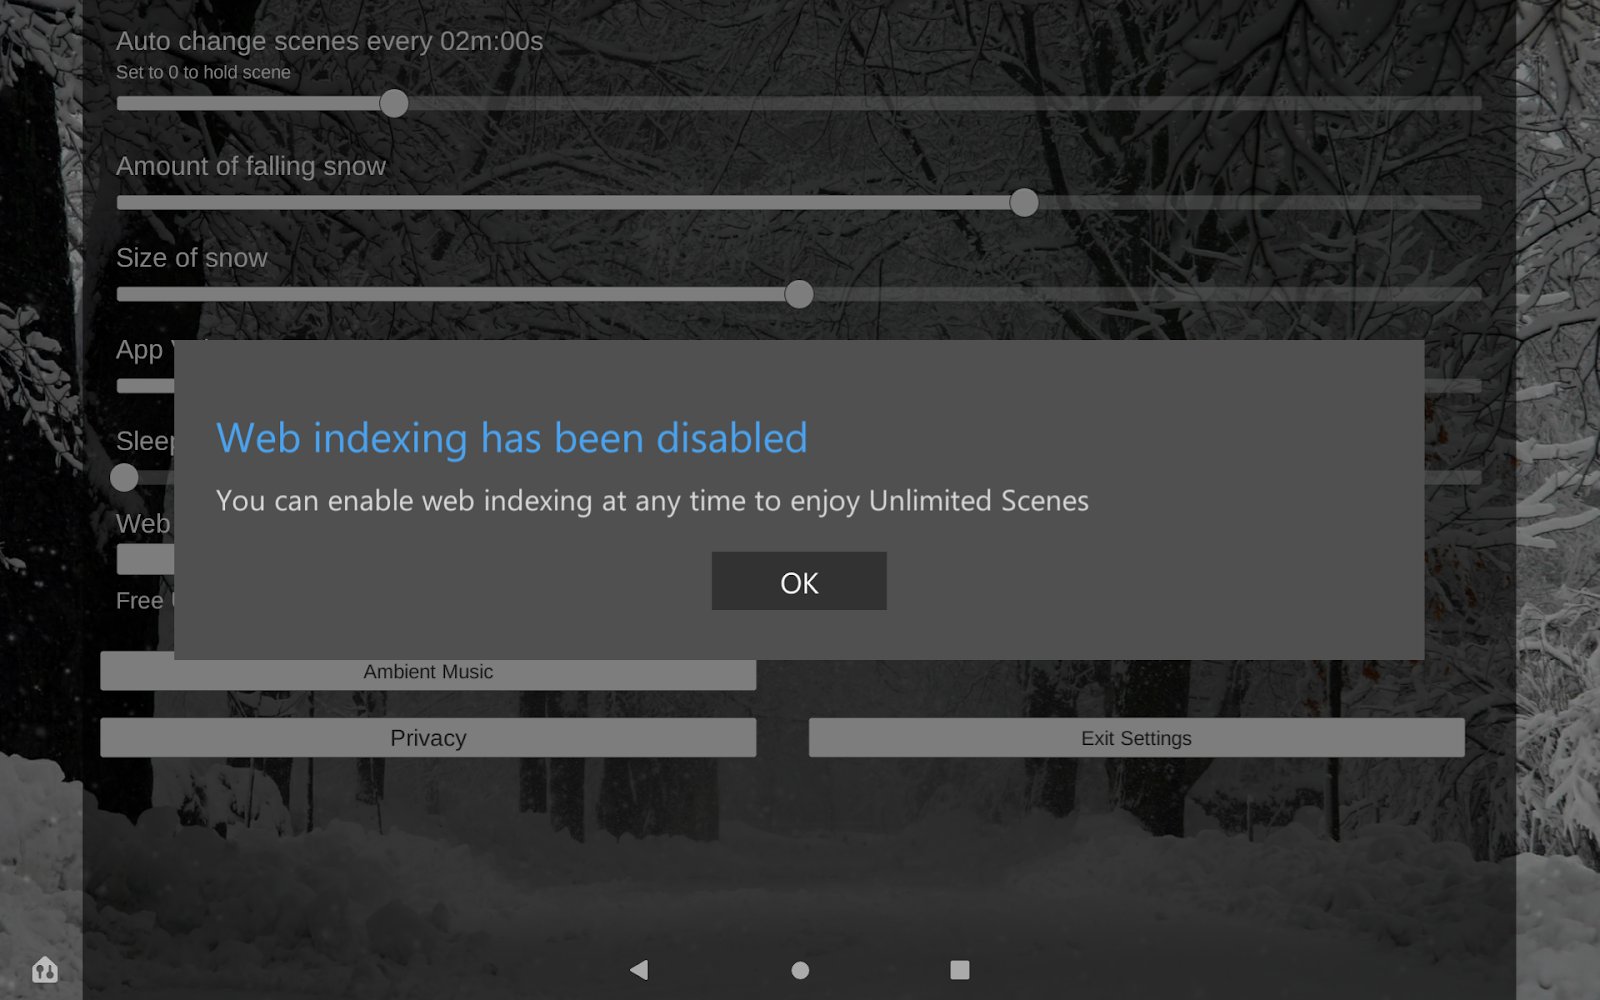
- Confirm opt-out: “You have successfully disabled Web Indexing. You may enable it again anytime from the settings menu.”
You are responsible for the text and design. These will be reviewed before publishing.
Update Application Installer
Install:
- Add the following text to your installation wizard under “License agreement”:
- Add step to deploy the following to your install directory:
lum_sdk.dllnet_updater32.exeBrd_config.json
- Add step to execute Bright Data service installer during app installation (recommended, optional):
- Process to start:
net_updater32.exe --install-ui APPIDIt will show the consent screen and if agreed, install the service.
- Process to start:
- Run
net_updater32.exe -hin command prompt to see available--dlg-parameters, or set them inbrd_config.json. - Wait for the process to finish before proceeding.
- Make sure no process uses
lum_sdk.dll(terminate your application). - Uninstall Bright Data service and remove all SDK files by executing
net_updater32.exe --uninstall APPID. - Wait for uninstall to finish before proceeding.
- Stop your application (which is using
lum_sdk.dll). - Stop Bright Data service:
luminati_net_updater_APPID- Where APPID is your assigned APPID with . (dot) replaced with _ (underscore).
- Example:
win_abc.myapp.com→luminati_net_updater_win_abc_myapp_com.
- Deploy new files:
net_updater32.exelum_sdk.dllBrd_config.jsonyour
- Choose one option:
- Option A: Install new
net_updater:net_updater32.exe --install-ui APPID- Shows consent to user (they can accept or decline).
- Requires admin privileges.
- Use
brd_config.jsonfor consent customization.
- Option B: Restart service if it exists
- Does not require admin privileges.
- Does not show consent.
- Option A: Install new
Add SDK Service Status Notifications (Optional)
NotificationsYou can register your app for notifications about the SDK service status. This allows you to:RecoveryIf the
- Know if the SDK is in a valid usable state.
- Prevent users from receiving benefits until they restore the SDK service.
BrightData.Api.ServiceStatusChanged event, the handler for the event is an EventHandler that receives the BrightData.Api.ServiceStatusChangedEventArgs as event data.See ServiceStatus enum for more information on the different status.The callback function can be called from a different thread than the one used to register the callback.
ServiceStatus is NotInstalled, Installed, or NotRunning, you can use the FixServiceStatus API to trigger automatic recovery.You can also trigger this on user action (e.g., “Click here to fix Bright Data SDK and regain benefit”).Self-Check Your Integration
Testing ModeYou may set
BrightData.Api.Settings.TestMode = true while developing. This way the BrightData service will not be installed when you accept the consent screen, making it easier to develop.Resetting During TestingWhile testing, you can:Option 1: Opt-out through settings- Remove Bright Data service by opting out through your application settings.
- Delete the
luminatifolder (or your entire output folder). - This resets your consent choice.
- Consent screen will display next time you run the application.
- Execute
net_updater32.exe --uninstall APPIDin your output folder. - This deletes all SDK files.
Update Your Terms of Service
Bright Data ensures users are fully informed about joining the peer network.Add the following text to your Terms of Service web page (TOS, EULA, or Privacy Policy):In return for premium features of ‘[Your App Name]’, you may choose to be a peer on the Bright Data network. By doing so, you agree to have read and accepted the Bright SDK EULA and Bright Data’s Privacy Policy.You may opt out of the Bright Data network by [add clear opt-out instructions].Requirements:
- Include all text and links as provided above.
- Any additional Bright SDK-related content must be shared during the app review process for approval.
How to Update SDK
Option A - Using the Integration CLI Tool (Recommended)
Option A - Using the Integration CLI Tool (Recommended)
Run the tool with the
--update flag. It will automatically fetch and replace the SDK files in place without losing your config or consent flow settings:Option B - Manual
Option B - Manual
- Download the latest SDK using the Bright SDK downloader.
- Replace the following files with the newer versions:
net_updater32.exe(ornet_updater64.exe)lum_sdk.dll(orlum_sdk32.dll/lum_sdk64.dllfor C/C++)brd_config.json
- Clean and rebuild your project.
API Documentation
- Settings in
brd_config.jsonare shared by bothlum_sdk.dllandnet_updater32.exe. - You can use the config file together with the programmatic API.
- Programmatic API settings take precedence over config file settings.
Configuration File (brd_config.json)
Configuration File (brd_config.json)
Required Properties
Optional Properties
| Property | Type | Description |
|---|---|---|
app_id | string | Your APPID |
app_name | string | Friendly name of your app that appears on the consent screen |
logo_link | string | URL to your app’s logo for the consent screen |
| Property | Type | Description |
|---|---|---|
benefit | string | Description of benefits user gets when enabling SDK. Changes consent screen wording. Becomes the first part of the first sentence on the consent screen |
agree_btn | string | Text of the consent screen’s agree button |
disagree_btn | string | Text of the consent screen’s disagree button |
opt_out_txt | string | Text of the consent screen’s opt-out instructions |
.NET API Reference
.NET API Reference
Methods
Properties
Events
Event Example
| Method | Description |
|---|---|
void BrightData.Api.Init(Settings settings) | Initializes Bright SDK. Should be called during app initialization. All other methods will be accessible afterwards. By default, consent screen will be shown if the user hasn’t made a choice yet, but can be skipped with Settings.SkipConsent = true |
void BrightData.Api.ShowConsent() | Displays consent screen. (Clears user choice and removes Brightdata service if installed.) Can be used when a user tries to close an ad or clicks the checkbox to activate Bright SDK |
void BrightData.Api.OptOut() | Disables Bright SDK and removes Brightdata service. ConsentChoice will change to false |
void BrightData.Api.Close() | Closes Bright SDK. Should be called when the application exits if the SDK cannot automatically detect the application exit and keeps running, keeping the app process running |
string BrightData.Api.GetUuid() | Returns the peer’s unique identifier. Useful for debugging |
| Property | Description |
|---|---|
bool? BrightData.Api.ConsentChoice { get; } | Returns the user’s consent choice. true if the user agreed, false if disagreed and null if no choice has been made |
| Event | Description |
|---|---|
event BrightData.Api.ConsentChoiceChanged | Occurs when the user’s consent choice has changed. For example when they accepted the consent or they disabled Bright SDK through your application settings |
event BrightData.Api.ConsentDialogShown | Occurs when the consent dialog is shown |
event BrightData.Api.ConsentDialogClosed | Occurs when the consent dialog is closed |
Settings Class
Settings Class
class BrightData.Api.SettingsRequired Properties| Property | Type | Description |
|---|---|---|
AppId | string | Your APPID. Required if not in brd_config.json |
AppName | string | Friendly name for consent screen. Required if not in brd_config.json |
AppLogo | string | URL to your app’s logo. Required if not in brd_config.json |
| Property | Type | Default | Description |
|---|---|---|---|
SkipConsent | bool | false | If true, Init won’t show consent screen. Use ShowConsent() to display later |
Benefit | string | - | Description of benefits. Changes consent wording. Becomes first part of first sentence |
OptOutText | string | - | Text of consent opt-out instructions |
Campaign | string | - | Optional parameter for statistics breakdown by campaign |
| Property | Type | Description |
|---|---|---|
AgreeBtn | string | Text of consent screen’s agree button |
DisagreeBtn | string | Text of consent screen’s disagree button |
| Property | Type | Format | Description |
|---|---|---|---|
TextColor | string | Hex ARGB “#AABBCCDD” | Color of consent text |
AppNameColor | string | Hex ARGB “#AABBCCDD” | Color of application name text |
BrightDataLogoColor | string | Hex ARGB “#AABBCCDD” | Color of BrightData logo background |
BackgroundColor | string | Hex ARGB “#AABBCCDD” | Background color of consent screen |
ButtonColor | string | Hex ARGB “#AABBCCDD” | Button color of consent screen |
| Property | Type | Default | Description |
|---|---|---|---|
Language | string | ”en-US” | Language code for consent screen. Supported: en-US, de-De, es-Es, fr-FR, it-IT, pt-PT, ru-RU, zh-CN |
Command Line Tool (net_updater32.exe)
Command Line Tool (net_updater32.exe)
Help & Information
Service Management
Dialog Customization
Analytics
Command Examples
| Argument | Description |
|---|---|
-h | Print command descriptions and help |
| Argument | Description |
|---|---|
--install-ui <appid> | Install service with provided appid after showing dialog and getting user permission |
--uninstall <appid> | Remove service with provided appid (must match appid used during install) |
--start-service <appid> | Start Bright Data service |
--stop-service <appid> | Stop Bright Data service |
--check-peer <appid> | Validate peer |
| Argument | Description |
|---|---|
--dlg-app-name <name> | Friendly name of your app for consent screen |
--dlg-logo-link <logo> | URL to your app’s logo for consent screen |
--dlg-benefit <benefit> | Description of benefits. Changes consent wording |
--dlg-language <culture> | Language code. Default: “en-US”. Supported: en-US, de-De, es-Es, fr-FR, it-IT, pt-PT, ru-RU, zh-CN |
| Argument | Description |
|---|---|
--campaign <campaign_id> | Optional parameter for statistics breakdown by campaign |